I write for Art Basics Guide, and the whole point of this site is to help beginner artists start with a small, practical kit rather than a huge shopping spree. Starting your art journey does not require an expensive studio setup. It requires a few decent tools, a willingness to make mistakes, and enough cheap paper that you actually use it.
I am between jobs and on a tight budget, so I buy the cheap pencils, pads, and paint sets myself and write down what held up. If something is not worth your money, I say so. I do not get free products and I am not one of those professional artists with a studio full of supplies. I am just someone who has spent a lot of time comparing prices in the art aisle and testing what works.
Quick-start checklist: the absolute essentials for a beginner artist
Here is the bare minimum list of art supplies for beginners. Everything on it is affordable and easy to find:
-
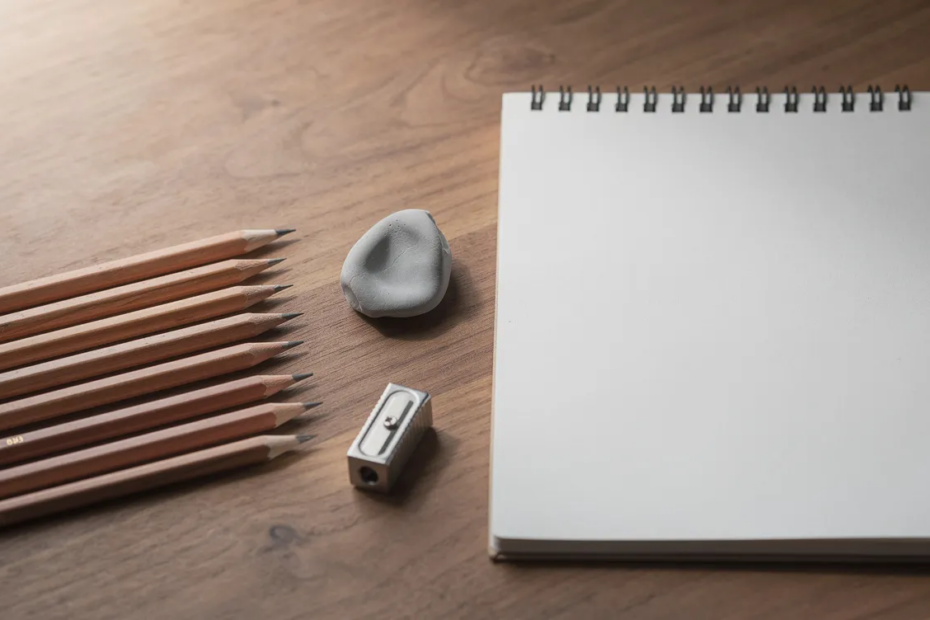
Graphite pencils: HB, 2B, and 4B
-
Kneaded eraser and a white plastic eraser
-
Basic sketch pad: around 7 x 10 inches, 60 to 90 lb paper
-
Metal-blade sharpener
-
One set of student-grade colored pencils (24 colors)
-
One black fineliner pen (waterproof)
-
A small set of acrylic paints (10 to 12 colors)
I will be honest, though. My own first kit was only graphite, a cheap pad, a kneaded eraser, a metal sharpener, and a hardcover book to lean on. That ran me roughly $15 to $25. The colored pencils, pen, and paints are add-ons for when the habit sticks and you decide you want color in your life.
These basics let someone try drawing, light mixed media, and painting without a big investment. The rest of this article expands on each category. I will reference concrete formats, like “24-color acrylic set” or “90 lb mixed media sketchbook,” but I will not push specific brands, so you can shop locally or online as you prefer.
Understanding art supplies: student grade vs professional grade
When I say “art supplies” in this article, I mean the practical tools for drawing, painting, and mixed media that an adult who is new to art is likely to buy: pencils, paper, erasers, pens, paints, brushes, and a few accessories.
The difference between student-grade and professional-grade materials comes down to pigment and filler. Student-grade paints are cheaper but less pigmented. They contain more inert filler and less actual pigment by weight, which means you need thicker layers and more coats to get coverage. Professional-grade supplies have higher pigment concentration, better handling, broader color variety, and usually stronger lightfastness. But they cost more, sometimes a lot more.
Here is my view: a decent budget brand that feels okay to use beats an expensive set you feel nervous about touching. Fear of wasting good material makes you draw worse. You tighten up, draw small, avoid experimenting. That is the opposite of what beginners need. Choose student-grade or mid-range supplies for experimentation, and save the premium stuff for when you can actually tell the difference.
Lightfastness is how resistant a color is to fading when exposed to light. If you are filling sketchbooks for practice, it barely matters. Once you start framing artwork or thinking about selling originals, it matters a lot. But that is a problem for later.
One warning: avoid the very cheapest unknown-brand paints and markers. They can behave erratically (bleeding, poor mixing, strange drying) and frustrate you out of the hobby before you get started. Student grade from a known brand is the sweet spot.
Choosing your first sketch pad and paper
A sketchbook is essential for beginners to practice drawing. It is where you will spend the most time. The quality of your paper directly affects how often you pick up a pencil, because if the paper is too expensive you hesitate, and if it is too flimsy the media misbehaves.
Let me share my paper mistake. I bought a thick, expensive pad thinking good paper would make me better. Instead I got stingy with it. I drew small, stiff pictures and rarely filled a page. A cheap pad of a few dollars fixed that, because the pages felt disposable. I drew bigger, faster, and more often. Once the habit was solid, I upgraded paper weight.
Sketchbook size can range from 3.5 x 5.5 inches to larger sizes. For everyday use, something around 7 x 10 inches or A4 is comfortable for adults. It is big enough to be expressive, small enough to carry.
Paper weight tells you how sturdy the sheet is:
|
Use case |
Weight (lb) |
Weight (gsm) |
|---|---|---|
|
Light dry sketching (graphite, pencil) |
~60 lb |
~90 gsm |
|
Mixed media (pencil, ink, light washes) |
90 to 110 lb |
150 to 180 gsm |
|
Watercolor (wet washes) |
~140 lb |
~300 gsm |
Regular drawing paper is about 60 lbs in weight. Mixed media sketchbooks typically use 90 to 110 lbs paper, which handles pencils, colored pencils, fineliner pens, and light watercolor without buckling too much. Watercolor paper can weigh up to 140 lbs. Cotton paper is more absorbent than wood pulp paper, which matters for watercolor, but 100% cotton paper is pricier than regular paper, so it is not where a beginner needs to start.
Bindings: spiral-bound pads fold back easily, which is nice in tight spaces. Glued or perfect-bound books open flatter for two-page spreads. I prefer glued because the pages do not rip around the holes. Watercolor sketchbooks are often perfect bound for flat laying.
My recommendation: a general-purpose mixed-media sketchbook prevents warping with wet media and handles most dry tools well. Around 90 to 110 lb is the target. Regular printer paper or plain copy paper is fine for the first few weeks of lines, circles, and basic forms, though it is thin and slick for heavy shading.
Graphite pencils: building a simple drawing set
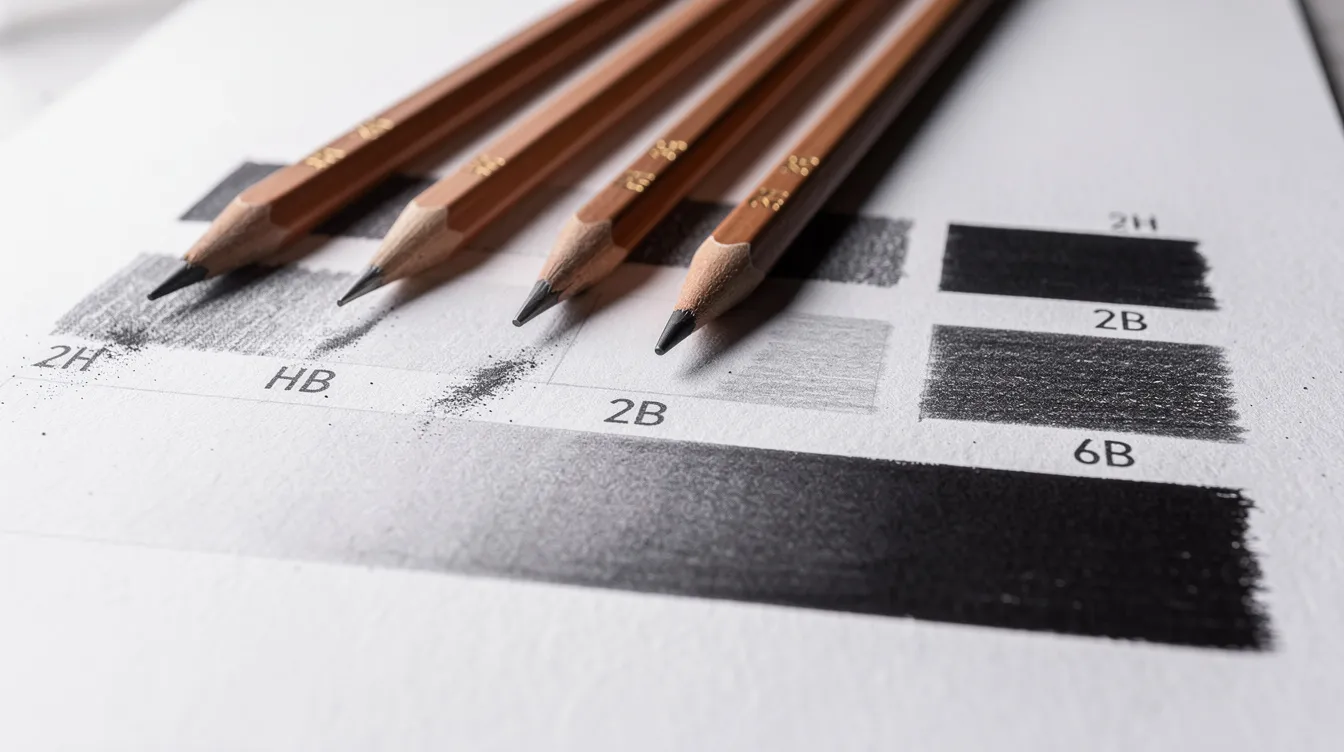
Pencils are versatile tools for sketching and drawing, and a modest range of graphite pencils provides versatility for drawing almost anything. Graphite pencils are graded from hard to soft using a scale that runs roughly from 9H (very hard, very light marks) through HB (middle) to 9B (very soft, very dark). The Wikipedia article on pencils is a clear reference on how the grading scale works, for readers who want the background.
H pencils are best for fine and clear cut lines, layout work, and construction. B pencils are soft and perfect for intensity and shadowing, expressive marks, and rich textures. HB sits in the middle and is the workhorse. If you want help picking between them, see my guide to the best drawing pencils.
A compact set for a beginner: 2H, HB, 2B, 4B, 6B. That said, I bought a big tin of 24 early on and used about four of them. The extreme ends (6H and up, 8B and up) just got in the way while I learned basic shapes. My own starter trio is HB for construction lines, 2B for most drawing, and 4B for dark shadows. I have a guide to the best drawing pencils for readers who want the longer breakdown.
How to practice with graphite in a sketch pad: draw simple value scales from light to dark, shade spheres and cubes, and sketch everyday objects to learn pressure control. These exercises build skills faster than copying elaborate tutorials.
Mechanical pencils are an optional tool for details. A basic one is a couple of dollars. But wood-cased pencils are more versatile for learning shading because you can use the side of the lead for broad strokes.
Erasers, sharpeners, and blending tools
Correcting and adjusting is part of drawing. Erasers are crucial for correcting mistakes in art, but they are also creative tools for pulling out highlights, softening edges, and shaping forms.
Three essential eraser types:
-
Kneaded eraser: a kneaded eraser can be molded to lift graphite without tearing paper. It works gently on charcoal too. You fold it to expose a clean surface, so it cleans itself. This is the one thing I would tell everyone to buy. It costs a dollar or two.
-
White plastic eraser: precise, clean removal for finer line work and brightening areas. A little more abrasive, so use it gently.
-
Mechanical or pen-style eraser: small tip for tiny corrections in details.
How to keep pencils sharp: a simple handheld sharpener with a sturdy metal blade works. In my testing, cheap plastic sharpeners with thin blades snapped soft leads constantly. Spending a dollar or two more on a metal blade sharpener was the one upgrade worth it. A craft knife works for sharpening too, if you feel comfortable with one. Safety first.
I have a rundown of the basic tools of drawing for readers who want the wider range of equipment they can add once the starter kit is sorted.
Blending stumps (also called tortillons) are rolled-paper tools for soft shading. Blending stumps allow you to blend and soften lines, giving smoother transitions with graphite and charcoal. You can clean them with a small piece of sandpaper. I will admit I got by with a finger or tissue at first and added stumps later. But fingers introduce skin oils to the paper, so a stump is the cleaner option.
Colored pencils: regular vs soft core and how to start
Colored pencils are popular with beginners because they are portable, relatively clean, and offer a lot of control compared with wet media. No drying time, no solvents, no cleanup. Colored pencils come in regular and soft core types, and colored pencils are forgiving and easy to erase compared with ink or paint.
Soft core colored pencils have a higher pigment-to-filler ratio. The core is creamier, lays down color more easily, and blends faster. The harder regular school-type pencils hold a point longer but put down less pigment per stroke.
Broadly, cores are either wax-based or oil-based:
-
Wax-based: soft, creamy, rich laydown, but can build a waxy “bloom” (a white haze on heavily layered areas) over time. Prismacolor Premier pencils are known for their blendability and are a popular wax-based choice.
-
Oil-based: slightly firmer, hold a point longer, layer cleanly with less bloom. Faber Castell Polychromos pencils are oil-based and popular for detail work.
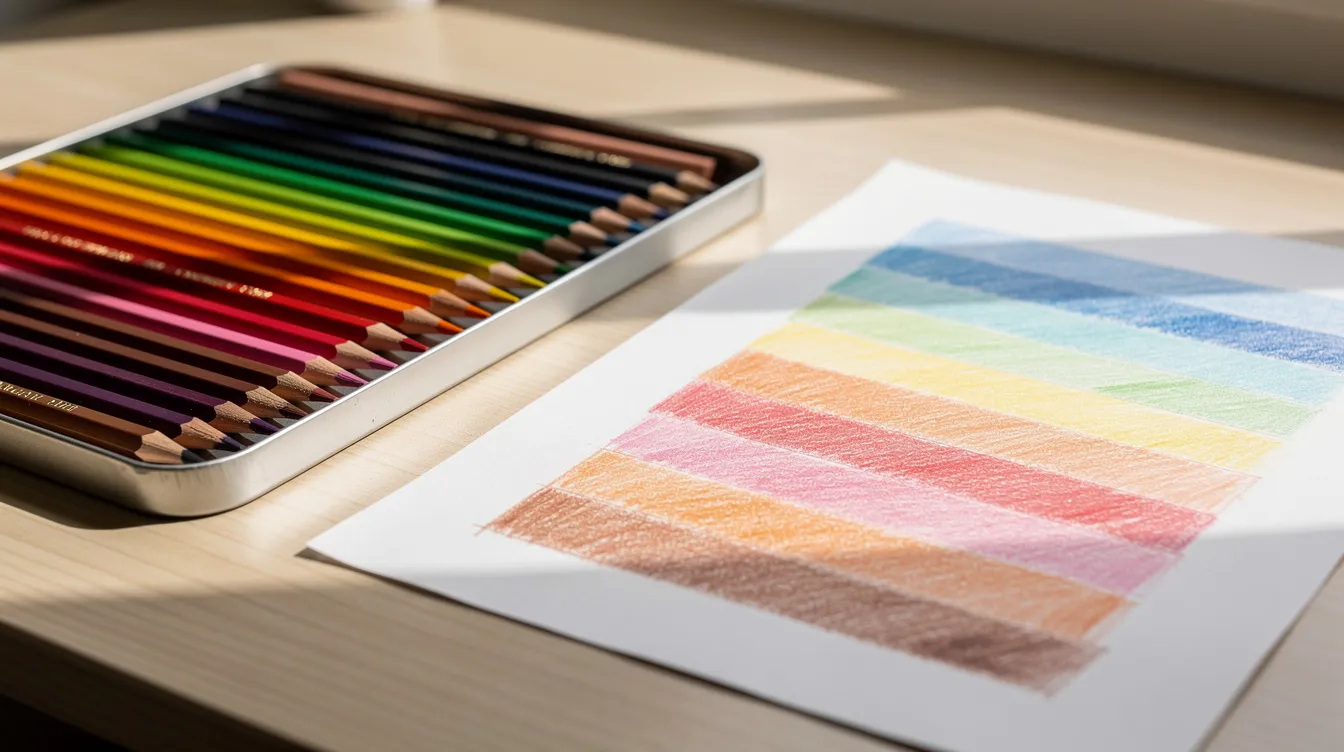
A starting set of 24 or 36 colors is enough to explore color mixing and basic shading without being overwhelmed. Many colors in a set means options, but too many early on creates decision fatigue. If you want the most drawing for the least money, graphite comes first and color can wait.
Tips for using colored pencils in a sketch pad: work in light layers, build up gradually, and try burnishing (pressing harder at the end) for rich, vibrant colors. Combining colored pencils with fineliner pens or graphite for mixed media effects is a simple way to explore different techniques.
Pens, fineliner pens, and gel pens for drawing
Many artists like to add pens to their supplies because they give crisp, confident lines, are great for sketchbooks, and combine well with watercolor and colored pencils. Ink forces you to commit to a line, which builds confidence faster than you might expect.
Fineliner pens come in common tip sizes like 0.1 mm, 0.3 mm, and 0.5 mm. Smaller tips handle fine details, larger tips work for outlines and filling. Waterproof, fade-resistant ink is best when layering with washes, because non-waterproof ink bleeds and ruins a wash layer.
Gel pens are a fun optional tool. They have smooth ink flow, and an opaque white gel pen is useful for highlights on colored pencil and marker drawings. Metallic colors work for accents and decoration.
My recommendation: start with a very small set. One black waterproof fineliner in one or two sizes (0.3 and 0.5 work well together) and a white gel pen. Avoid buying large multipacks of supplies that will remain unused. Most of those colors or tip sizes sit in the case untouched until the ink dries out.
Sketching ideas that use pens: urban sketching (capture a building or street scene quickly), quick gesture drawings, and adding ink outlines over light pencil structure lines. That last one, pencil underneath then fineliner on top, is one of the most satisfying mixed media combinations for beginners.
Markers for beginners: alcohol markers and water-based options
Alcohol markers are water-based and lay flat on paper, giving smooth, saturated coverage. They use dye or pigment in an alcohol solvent, which evaporates quickly and leaves vivid color. Alcohol markers can be blended even after drying, which makes them forgiving in a way that paint is not. Alcohol markers allow for blending without damaging paper, so you can rework transitions without tearing the surface. They do have a strong odor, and colors can fade over time with light exposure.
Water-based markers are more common, less expensive, have less smell, and are easier to clean up. They may not produce the same saturated finish, but they are simpler to handle.
Typical nib types on markers include bullet tips for details, chisel tips for filling areas, and brush-tip markers facilitate blending and seamless appearances, making them behave somewhat like a paintbrush.
Do you need alcohol markers right away? My honest take is no. They are a pricey extra layer of supplies purchased separately from your core kit. Copic markers are popular among professional illustrators, and even budget alternatives add up fast. But markers are beginner friendly for vibrant illustrations and doodles, so a small set of 12 to 24 makes sense for readers interested in illustration, character art, or design.
Alcohol markers combine well with fineliners and colored pencils, but a heavier mixed media pad is needed because thin paper bleeds through. Work in a well-ventilated space and put scrap paper under the page to protect the sheet below.
Intro to paints: comparing watercolor, acrylic paints, and oil painting
Basic color mediums include watercolors, acrylics, and colored pencils. When beginners think about painting, they usually hear about three types. Here is how they compare.
Watercolor: transparent, reactivates with water, suited to lighter sketching and travel. Watercolors are forgiving and versatile for beginners. Cleanup is just water. The challenge is water control, because mistakes are harder to hide in a transparent medium.
Acrylic paints: opaque and beginner friendly. Quick drying, water cleanup, best on primed paper or canvas. Acrylic paints are very forgiving because mistakes can be painted over once the previous layer dries. The fast drying does affect blending time, so you work quickly or mist paint with water.
Oil painting: slower drying, rich and blendable, allows extended working time for smooth transitions. Requires solvents or modern solvent-free mediums, ventilation, and more careful cleanup. Costs more to get started.
Also worth mentioning: gouache is water-soluble and dries matte. It sits between watercolor and acrylic in behavior and is worth exploring later, but it is not essential on day one.
Painting fundamentals start with choosing one medium to explore first. Most beginners should start with watercolor or acrylic before investing in a full oil painting setup, unless they already know they are drawn to oils.
One caution about all-in-one art kits with paint, pencils, and pastels: they tend to pad out the box with low-quality items you will not use. A few singles you know you need cost less and work better. Avoid buying large multipacks of supplies that will remain unused.
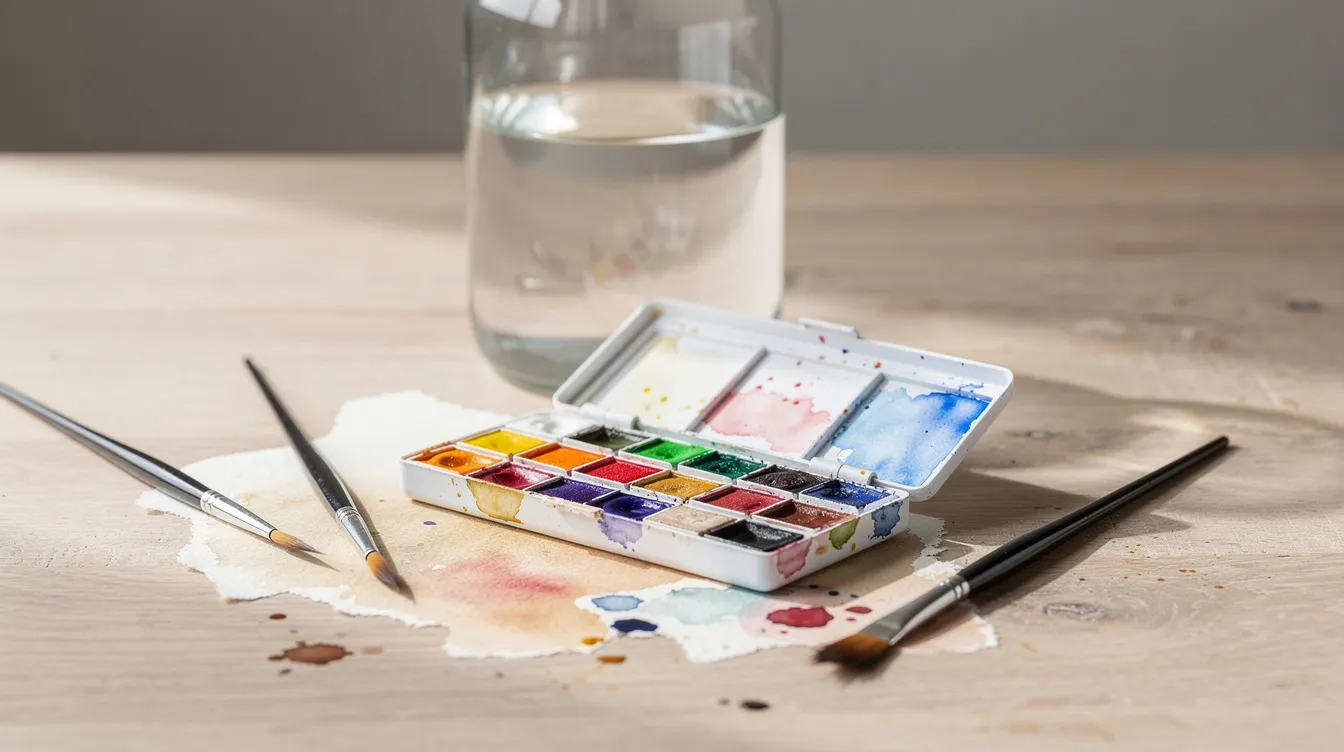
Starting with watercolor: pans, tubes, and basic tools
Watercolor is a popular first painting medium because the supplies are compact, there is minimal odor, and setup and cleanup take minutes. A limited palette of primaries encourages learning color mixing rather than relying on pre-mixed hues.
Pan sets vs tube sets:
-
Pans: pigments dried in small wells. Great for portability and travel. Less waste for small paintings. But cheap pans sometimes do not rehydrate well.
-
Tubes: pigment in paste form. Better for mixing larger washes, higher pigment yield. But tubes take more space and risk drying out if left uncapped.
Paper matters. Watercolor demands heavier paper to resist warping. Standard is 140 lb (300 gsm) cold-press. Your mixed media pad around 90 to 110 lb handles only light washes; anything heavier needs proper watercolor paper.
Basic watercolor tools a beginner needs:
-
A small set of paints (8 to 12 colors)
-
Two or three synthetic brushes in different sizes (a round size 6, a round size 2, a flat wash brush)
-
A simple palette or plate for mixing
-
Two water containers (one clean, one for rinsing)
-
A cloth or paper towel
Start with a limited palette and practice gradients, wet-on-wet washes, and simple shapes. These exercises teach you how the paint flows and how water behaves on paper, which is the real skill in watercolor.
Starting with acrylic paints: paints, canvases, and surfaces
Acrylic paints suit beginners who like bold color, easy corrections, and texture. They dry fast, clean up with water, and layer well. That fast drying affects blending time, but a spray bottle of water helps keep the paint workable.
A small student-grade set of 10 to 12 colors is enough for basic mixing. Cover your primaries (red, yellow, blue), white, and a couple of earth tones like burnt sienna or raw umber. From those you can mix a wide range of colors without buying extras.
Painting surfaces for acrylic:
-
Canvas pads: pads of primed canvas sheets. Store flat, affordable, easy to try.
-
Canvas boards: canvas glued to rigid cardboard. Sturdy, stores flat.
-
Stretched canvases: the classic, in sizes like 8 x 10 or 11 x 14 inches. More expensive per piece.
Start with canvas pads or boards. They cost less and you will not feel guilty about using them up. Brushes are essential for applying paint in various techniques, and a few synthetic flat and round brushes cover most needs. Add a flat plastic or wood palette and a spray bottle or small cup of water to keep things moving.
Oil painting basics for cautious beginners
Many artists are drawn to the look of oil painting but feel intimidated. That is fair. Oils involve more steps, more materials, and more cleanup. But a beginner can start with oils if they understand what they are getting into.
What makes oils different: pigment mixed with drying oil, slow drying that allows extended blending, and the traditional need for solvents (or modern low-odor alternatives) to thin paint and clean brushes. The world of oil painting rewards patience.
A minimal setup:
-
A small set of core colors (5 is enough: white, yellow, red, blue, an earth tone)
-
A couple of bristle and synthetic brushes
-
A primed canvas or board
-
Low-odor mineral spirits or a solvent-free medium
Start with small canvases and simple still-life subjects. Paint in a well-ventilated area. Wipe brushes on a rag before cleaning to reduce solvent use.
Ultimately, oils can wait until you are comfortable with drawing and color mixing in acrylics or watercolor. On a tight budget, I would wait. The nature of oil painting is that the supplies, solvents, and surfaces all add up, and other mediums teach you the same fundamentals for less.
Support tools: palettes, palette knives, tape, and storage
These tools make painting and mixed media more comfortable and efficient, even though they are not as exciting as paints and pencils.
Basic palettes for acrylics and watercolor: inexpensive plastic palettes, white ceramic plates from the kitchen, or disposable palette paper pads for easy cleanup. A white surface helps you see true color. A jar from the kitchen works for water, and that is all you need.
Palette knives are simple metal tools for mixing paint and crafting textured strokes. A beginner can start with one medium-sized knife with a comfortable handle. Not essential on day one, but useful once you are painting regularly.
Low-tack artist tape or masking tape is handy for clean edges and taping watercolor paper down to prevent warping. For storage, pencil rolls, small boxes, or zip pouches keep art supplies organized. Loose pencils roll off desks and break their tips, as I learned the hard way.
Keep a compact “grab and go” kit packed so you can sketch in any free moment. A clipboard or hardcover book under the pad beats buying a drawing board or easel. Fixative spray protects sketches from wear and tear over time, but it can wait until you create something worth protecting.
Recommended first mixed media experiments
Even simple mixed media experiments help beginners discover what they enjoy without buying every supply at once. You probably already own enough to try a few combinations.
Accessible combinations using tools already discussed:
-
Graphite plus fineliner: sketch forms in light graphite, then define edges with black fineliner. Observe how line and value interact.
-
Colored pencils over light watercolor washes: lay down a pale wash for sky or background, let it dry, then add colored pencil details and texture on top.
-
Fineliners with alcohol markers: use markers for base color, then sharpen edges and add details with a fineliner.
A mixed media pad with 90 to 110 lb paper handles these combinations better than thin drawing paper, which buckles and bleeds. Keep early pieces small, like postcard-sized or half a page in your sketch pad, so the process feels playful and low-pressure. The point is exploration, not perfection.
There is no “wrong” sequence of media, but remember that watery media can smear some inks and that heavily waxed colored pencil areas are hard to paint over. Charcoal is versatile for creating deep black areas and works well layered with graphite, though it is messy and benefits from fixative if you want to keep the piece. Pastel pencils are another dry medium worth trying once you are comfortable with layering, and pastels in stick form offer even bolder coverage.
How to build your art supply collection over time
You do not need to buy everything in one month. Regular practice helps develop art skills more effectively than equipment. Focusing on a small kit helps build fundamental skills, and gradual, intentional upgrades are smarter and usually cheaper than a big haul that gathers dust.
A simple upgrade plan:
-
Start with the basic kit: pad, a few single pencils, a kneaded eraser, and a metal sharpener. With leftover money, buy a second pad so the first never feels precious.
-
Upgrade paper quality next. Better paper gives better feedback from every tool you use.
-
Pick one favorite medium, whether that is colored pencils, acrylics, or watercolor, and invest in it based on what you enjoy using most.
-
Add better brushes, pens, or tools as specific needs become clear.
Create a manageable shopping list for your first art supplies and stick to it. A realistic monthly or quarterly budget, focused on a few targeted purchases, beats impulse buying lots of similar items.
Use your sketch pad as a testing ground. Note dates next to experimental swatches, write down which pencils or paints you used, and observe how they feel after several sessions. This is how you learn your own style and preferences. Many artists do this in dedicated journals, and it saves money over time because you stop buying things that do not suit how you work.
Art supplies for beginners should include basic drawing and painting essentials, nothing more. The rest comes with time, experience, and a clearer sense of what you want your creativity to look like. Explore more guides on Art Basics Guide, including beginner shopping lists and technique articles, so you can keep learning as you slowly expand your toolkit.
FAQ
Do I need expensive supplies to learn to draw?
No. Student-grade pencils and a cheap sketch pad are plenty. Better materials matter more later, once you can tell what is holding you back. I personally find that many beginners blame their supplies when the real issue is just needing more hours of practice.
How many pencils should a beginner buy?
Three or four is enough: HB, 2B, and 4B cover structure, mid-tones, and shadows. Add others only to fill a specific gap. You do not need 24 pencils on your desk to learn shading.
Is copy paper okay for practice?
Yes, for line work and basic shapes. But it is thin (about 60 to 80 gsm), slick, and handles heavy shading and erasing poorly. Move to a cheap sketch pad when you can. It does not need to be expensive; it just needs a bit more tooth and weight.
What is the one thing worth paying a little extra for?
A decent metal-blade sharpener, since a flimsy one kept breaking my leads. A kneaded eraser is cheap enough to buy regardless. These two budget friendly tools together cost a few dollars and save you frustration every single session.
Should I buy a big art set that includes paint, pencils, and pastels?
Probably not. Those kits tend to include many low-quality items you will not use, like sticks of pastel you never open or brushes that shed on the first stroke. A few singles you know you will use cost less and work better. Save the money and put it toward one good pad and a handful of drawing tools you actually like. Good luck, and use the pages.